Showing posts with label Recipes. Show all posts

Saturday, November 29, 2014

The BEST Cherry Cheesecake

I don't know how else to say this, but you've been missing out if you haven't had my mom's Cherry Cheesecake yet. Seriously. I requested this for my 21st birthday in lieu of a "real" cake, and it's the first cheesecake Perry will actually eat, rather gobble up. And to think he tried to pass on it...
This dessert is not only a traditional item in the Patrick family, but has made it's way into the Dustin family as well! I made a double recipe for Thanksgiving, and it was gone within 24 hours. That's some serious goodness! Does pumpkin pie even go that fast?!

I don't have it memorized quite yet, so I thought I'd add this recipe to my blog because it's the one recipe I ALWAYS need when I'm out of my kitchen. Enjoy! And then come back and tell me how you like it!

Cherry Cheesecake

Ingredients
Crust:
1 1/2 graham cracker packages
1/3 cup sugar
6 tbs melted buttter

Filling:
1 8oz package of cream cheese (softened)
1/3 cup lemon juice
1 14oz can sweeten condensed milk
1 tsp vanilla
1 can cherry pie filling

Directions
1. For the crust you can either buy a pre-made graham cracker crust, or make your own. To make your own, crush the graham cracker leaving no large pieces. I put mine in a bowl and use the bottom of a cup to crush them.
2. When they're crushed, add the sugar and melted butter.
3. Press into a a 9 in pie pan, or 9 in square pan using wax paper.
4. To make the filling, beat the cream cheese with mixer until it's fluffy.
5. Add the sweeten condensed milk, lemon juice and vanilla and mix until combined.
6. Pour on top of the crust.
7. Let chill in the refrigerator for at least 3 hours.
8. Spread cherry pie filling on top before serving.

Enjoy!

Wednesday, January 29, 2014

The Perfect Baked Potato

I'm not much of a potato fan, but it has been appearing on the dinner table fairly frequently the last few months. Potatoes are awesome when you're on a budget so I'm learning to love them. JP on the other hand - I'm not sure if he hates chicken or potatoes more? I managed to get through many childhood meals, where mashed potatoes were served on the side, by slathering them with butter. I can actually still picture the crater in my potatoes filled with melted butter. Yum... But as a child, if I had to have potatoes, I would rather have baked potatoes over mashed. Anyways...

It seems as though each time we are served a home-cooked meal by Perry's mom, twice-baked potatoes are always on the menu. They are super delicious, but I can't seem to recreate them for Perry, as they are one of his favorite sides. For now anyways, twice baked potatoes will be a nice treat at the cabin. In the meantime I have mastered the "standard" baked potato.

There's a few different ways you can bake potatoes. Growing up, I had learned to wrap them in foil. Wrapping potatoes in foil makes the peel soft when you cook them. Although they can be quite tasty this way, my new favorite method is so much easier for me. I hate foil... Plus the crispy outside has ME wanting seconds, which is pretty rare!

1. Preheat the oven to 425 degrees.

2. Wash the potatoes under running water and pat dry.

3. Place potatoes in a small bowl. Add enough olive oil to coat all the potatoes. Add Alpine Touch (my favorite seasoning), a little bit of garlic salt, and a hint of dill to the bowl. Using your hands, mix all the ingredients to evenly coat all of the spuds.

4. Pierce each potato multiple times with a fork to allow the steam to escape.

5. Bake the potatoes in the oven for about an hour. You can place them directly on the rack, like I do, or use a baking sheet to place them on. Turn potatoes every 15 minutes for even crispiness.
Delicious! What's your favorite way to eat a potato?

Tuesday, December 10, 2013

Chicken Bacon Ranch Quesodillas

I've been all about making new foods lately. Thankfully Perry and the boys have been good sports about eating all the new dishes. Some have been good, some not so good, but at least we're experimenting! However, last night I stumbled upon pure yumminess! I'm not a huge ranch fan, but Perry, Hunter, and JP are, and they're huge bacon fans too - double bonus! This has definitely made it to our favorite list!

Here's where I found the original recipe, but I made a few changes of my own. Very rarely do I ever cook for just myself, so I altered the recipe to feed my family of 4.

Ingredients:
4 Tortillas
1 Chicken breast cut into thin strips
1 Package of bacon with strips cut in half
Shredded cheddar cheese
Ranch dressing
Mushrooms (optional)

Cook the chicken in a frying pan with a little bit of oil. While the chicken is cooking, you can also cook the bacon which ever way you choose. I cooked mine on the stove over low heat, and season it with Alpine Touch. When the bacon and chicken are done cooking, heat a frying pan (large enough to fit the whole tortilla in) over medium to low heat. Place tortilla in the heated pan and lay the shredded cheese over it evenly.
While it's melting lay strips of the chicken and 4 pieces of bacon on one half of the tortilla. If you are adding any extras to the quesodilla like mushrooms, now is the time to add them. Drizzle ranch over the top. Once the cheese is melted, flip the cheese only side onto the "loaded" side and cook until the bottom is brown, and then flip over and brown the other side. Repeat for the rest of the quesodillas.

*If you want to speed up the process, you can use pre-cooked bacon or bacon crumbles, and canned chicken. Left over chicken and bacon works too!*

I think I might add tomatoes to mine next time and dip it in buffalo wing sauce....yummm!

Monday, November 4, 2013

Mozzarella Pepperoni Bread

I've been doing a lot of meal planning lately so I don't have to run to the store multiple times a week. For one, it saves you money because you don't have a bunch of extra impulse buys. For two, who really wants to drag 2, let alone 3 kids around a store for a few items. Not me, especially since Hunter and JP refuse to sit in a cart and I'm helpless to make them since Kiki is usually sitting in the front carrier and would be kicked by said child upon their refusal to sit in the cart... 
Anyways, I called a friend to have her suggest a favorite meal of theirs. She routed me to something called spaghetti bread, or something similar. I was game for it since I had all the ingredients on hand except the loaf of bread. When I arrived home from the store though, I found this recipe in my "Ultimate Five Ingredient Recipes" book that I opted to try out instead. 
Here I present to you Mozzarella Pepperoni Bread. Also known to JP as Caterpillar Bread, or more commonly, Pizza Bread.

Ingredients
1 loaf French Bread
3 tbs melted butter
1 package of pepperoni
1 1/2 cups shredded mozzarella cheese
3 tbs parsley


Cut the loaf of bread in half widthwise, and then cut into 1-inch slices, leaving the slices attached to the bottom. Brush butter on both sides of each slice. Stuff pepperoni between the slices. Sprinkle with cheese and parsley.

Place the bread on an ungreased baking sheet. Bake at 350 degrees for 12-15 minutes or until cheese is melted. 


Made approximately 12 slices, which fed our family of 4 with some leftovers. JP gobbled 3 slices down and announced "I love it." Before he decided he was full. 

Cheesy Beef & Tomato Casserole

One of my goals this year is to try 50 new recipes. I found this one from Betty Crocker and it has landed itself in our favorite meals category. Perry even ATE the zucchini instead of picking them out. My job here is done...

Ingredients

1 lb ground beef
1 medium onion, chopped (1/2 cup)
1/2 tsp salt
1/8 tsp pepper
3/4 cup uncooked medium-grain white rice 
1 cup water 
1 medium zucchini, cut into 1/4-inch-thick slices (2 cups)
1 large tomato, chopped (1 cup)
1 can (19 oz) Progresso® Vegetable Classics tomato basil soup
 2 cups shredded mozzarella cheese (8 oz)

Directions

1. Heat oven to 375°F. Spray 13x9-inch (3-quart) glass baking dish with cooking spray. In 10-inch skillet, cook beef and onion over medium-high heat, stirring frequently, until beef is thoroughly cooked; drain. Sprinkle with salt and pepper.
2. Place rice and water in baking dish; stir to mix. Layer cooked beef, zucchini and tomato over rice. Pour soup over top. Cut 16x12-inch sheet of foil; spray with cooking spray. Cover dish with foil, sprayed side down.
3. Bake 40 minutes. Uncover dish; sprinkle cheese over top. Bake uncovered 10 to 15 minutes longer or until edges are bubbly and cheese is lightly browned.
I always over do it with cheese!

*If you have zucchini from your garden you could it as well and cut it into small cubes. We however had a mix up in our garden planting this spring and didn't get ours planted... Oops!

Loaded Baked Potato Soup

Soupy Sunday this week featured the this tasty Loaded Baked Potato Soup. Yumm!

Ingredients

8 slices bacon cooked and crumbled (save about 2 tablespoons of crumbled bacon for garnish)
2/3 cup butter
2/3 cup all purpose flour
7 cups milk (I use 2%)
4-6 potatoes, baked peeled and cubed
4 green onions, chopped plus additional for garnish
2 cups sharp cheddar cheese, shredded plus additional for garnish
1 cup sour cream
1 teaspoon salt
1 teaspoon ground black pepper

Directions

1. In a large stock pot, melt butter over medium heat. When the butter has melted, whisk in flour and allow the mixture to cook for a few minutes.
2. Slowly add in 7 cups of milk, 1 cup at a time, whisking really well between each cup.
3. When all 7 cups of milk have been added, continue whisking until the mixture starts to thicken a bit.
4. Add in cubed baked potatoes and green onions, then bring to a boil making sure to stir frequently.
5. Reduce the heat to low, then stir in bacon, cheese, sour cream, salt and pepper.
6. When the cheese has melted serve immediately.
7. Garnish each bowl of soup with additional cheddar cheese, bacon crumbles, and chopped green onion.
This recipe fed our family of 4 and then had a little bit of leftovers for lunch the next day. 

Potato & Ham Bake

Normally when we buy ham, we buy it by the...loaf? Not sliced. This way I have more options as to what to do with it, instead of buying it in pre-sliced packages. This is a great recipe to use up our ham, and the kids love it, even though it has asparagus in it! It also gives variety to how we're eating our spuds!

Potato & Ham Bake

Ingredients

3-4 potatoes sliced
1 8 oz tub of cream cheese spread with chive and onion
3/4 cup milk
1/4 cup shredded Parmesan cheese
1/4 tsp black pepper
1/2 tsp dried tarragon, crushed
8 oz cooked boneless ham cut into bite-sized cubes
1 lb fresh asparagus cut into 2 inch pieces

Directions

1. Preheat oven to 400 degrees. Grease a 1 1/2 quart baking dish.

2. In a medium sauce pan, cook potatoes, covered, in lightly salted boiling water for about 7 minutes, or until tender. Drain and set aside.

3. To make the sauce, use the same sauce pan and combine cream cheese, milk, 2 tablespoons of the Parmesan cheese, and the pepper. Heat and whisk mixture until smooth and the cheese is melted. Remove from heat and stir in tarragon.

4. Layer half the potatoes, ham, asparagus, and cheese sauce in the baking dish. Repeat layers then cover with foil.

5. Bake for 20 minutes. Remove foil and sprinkle with the remaining Parmesan cheese and bake uncovered for an extra 10 minute. Remove and let rest for 5 minutes before serving.

I serve ours with a side of steamed broccoli. (Which is super good with Italian dressing!)

Friday, October 25, 2013

Monster Hot Chocolate

In lieu of Halloween, I made the kiddos a special treat for dinner instead of their usual cup of milk.
 These were SO much fun to make! If I wasn't surprising the boys, they probably would have eaten all of the marshmallows and all the mini chocolate chips. 
 Who wouldn't want eyeballs in the hot chocolate?!

Friday, August 23, 2013

Chicken Enchiladas

I somehow ended up with a surplus of tortillas in our pantry so again on the Mexican theme, we had Chicken Enchiladas for dinner tonight. This is definitely one of Perry's *favorite* meals. 
Before I get to the good stuff, let me just remind you how JP cracks me up. As I was cooking the chicken, Hunter came into the kitchen and grabbed a pair of tongs off the counter and asked what they were. I answered, "They're tongs. I'm going to use them to get the chicken out of the pot so I don't burn my hand." Stupid me. I said the word "chicken" loud enough for JP to hear me, who was watching TV in the living room. Of course I got the usual, "Ugh!" *with his head thrown back into the air* "I don't like chicken!" Moms are allow to lie a little when it comes to food, right? Back me up here... "We're not having chicken." To which he retorts "Yes we are, I can smell it." "No, you just smell cheese." "Oh, okay." And that was that, and guess who ate his dinner, AND had seconds? JP. 

On to the recipe....

Ingredients:
2 chicken breasts or approximately 2 cups of shredded cooked chicken
1 10oz can of enchilada sauce
1 can of Progresso Chicken and Cheese Enchilada soup
2 cups of shredded Monterey Jack cheese (I've substituted with cheddar and still tastes wonderful!)
green onions
tortillas of your choosing

1. Cook chicken. (Or shred left over cooked chicken if you have some.) You can do this however you choose, but I prefer to boil mine. After cooling, shred chicken with a fork.
*For those of you with a Kitchen Aide mixer, I've got a shortcut for you! Once the chicken is done cooking, throw it in your mixer for about a minute or so and you'll have perfectly shredded chicken in half the time!*
*Note: the chicken must be warm or you'll wreck your mixer! And put the lock on.*
2. Mix soup with the enchilada sauce and pour 1 cup of the mixture into an ungreased 11x7 baking dish.
3. Mix about 1 cup of the soup mixture with the shredded chicken and 1 cup of cheese.
4. Warm your tortillas and fill with approximately 1/2 cup of the chicken mixture. *We normally use the "big" tortillas and can fit 6 rolls in the dish. If you use smaller tortillas, you could lessen the filling and use more tortillas*
5. Fold up tortillas and place seam side down in the baking dish. 
6. Cover tortillas with the remaining soup mixture, followed by 1 cup of cheese and your desired about of green onions.
7. Bake at 350 for 30 minutes or until bubbly. 
Enjoy! 

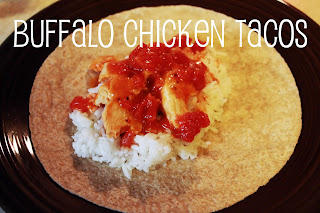
Buffalo Chicken Tacos

Normally when I make Buffalo Chicken, I make it in a casserole dish. But this week my mind is in Mexico...

Buffalo Chicken Tacos are super easy make. So easy I'm putting them in my 20-minute meals category. 

Ingredients:
2 chicken breasts cut into strips
1/2 cup of Frank's Buffalo Wing Sauce
1 can of diced tomatoes, semi-drained
1 1/2 cups of rice
Tortillas

1. Cook rice as directed on package.
2. Cook chicken in a skillet until done. 
3. Add wing sauce and tomatoes. Stir and let simmer for about 10 minutes. 
4. When rice is done, add a scoop of rice to a tortilla and top with chicken mixture.
5. Fold up and enjoy!

Optional - You could add a dollop of blue cheese dressing to the taco, or use it as a dip. 

Friday, June 28, 2013

Grilled Mediterranean Chicken and Vegetable Kabobs

This was our first time having kabobs and I am absolutely IN LOVE with the marinade I used! 


Rosemary-Lemon Marinade
3 tbs vegetable oil
1/3 cup lemon juice
1 tsp dried rosemary leaves
1/2 tsp salt
1/4 tsp pepper
dash of Alpine Touch (since it's my favorite seasoning)

Cut 2 breasts of chicken into 1 1/2 in chucks/cubes. Mix all the marinade ingredients together and add chicken. Cover and let sit in the refrigerator for approximately an hour. Meanwhile, cut the vegetables of your choice into 1 inch cubes. I used a zucchini, red onion cut into wedges, and a red pepper. You could also use broccoli and mushrooms.

Begin heating grill when chicken is done marinating. Using skewers, thread chicken and vegetables in your desired order. I thread mine like this: chicken, pepper, onion, zucchini. I ended up with extra chicken so I made one whole skewer just chicken. Save the marinade once all chicken is removed from it. 

Grill kabobs over medium heat for about 10-15 minutes. Turn and brush them with the leftover marinade frequently. I served our kabobs with grilled asparagus as well, which I threw on the grill for about 5 minutes. I had bought feta cheese to sprinkle over the kabobs before serving them, but I completely forgot about it until the meal was pretty much over...  
Yummy!!

Tuesday, June 25, 2013

Baked Cavatelli

I love a good Italian dish and a little change from the usual chicken and ground beef dishes is nice once in a while too, even though I'm not a huge fan of sausage links. There's never left overs at house when this is on the menu!


Ingredients:
2 1/2 cups cavatelli noodles (I use penne noodles instead)
12 oz Italian sausage links sliced 1/2 in thick
3/4 cup chopped onion
2 cloves garlic, minced
1 26oz jar of pasta sauce
1 cup shredded mozzarella cheese 
1/4 tsp black pepper
Italian seasoning to taste (optional)
 
Directions:
1. Preheat oven to 375 degrees. Cook pasta as directed on package.
2. In a large skillet, cook the onion, garlic and sausage until sausage is brown. 
3. Stir together pasta sauce, 3/4 cup of the mozzarella cheese, pepper, and Italian seasoning. Add the cooked pasta and drained sausage to the mixture. Stir together gently. Spoon mixture into 2-quart casserole dish.
4. Cover. Bake for 25 minutes or until heated though. Uncover and add remaining mozzarella cheese. Bake for an additional 5 minutes, or until cheese is melted.

Prep time: 25 minutes
Total time: 55 minutes

*Usually when I make this dish I double it and freeze half. I end up with more meat in the dish due to the packaging of the sausage we buy. I also make ours extra cheesy. Yum!* 

Cheesy Bowties with Broccoli Alfredo

Up until the last few years, I've hated broccoli, but amazingly so my boys love it, as long as you call them trees. Perry is still on the fence about it but I'm working on him...Even still, he gave the thumbs up for last night's dinner, Cheesy Bowties with Broccoli Alfredo. I better mention, it was the leftovers that received the thumbs up since he didn't make it home in time for dinner!

Ingredients:
1 (24oz) bag of frozen broccoli with cheese sauce from Green Giant
3-4 cups of bow tie pasta (farfalle)
1 (14.5) jar of Alfredo sauce (I used the kind made by Prego)
1 can of diced tomatoes with basil, oregano and garlic, semi drained
ground pepper - about 1/8 tsp
dried basil

1. Heat oven to 350 degrees. Spray a 2-quart casserole dish. Cook pasta as directed. Cook frozen broccoli as directed on the bag.
2. In the dish, mix all the ingredients together, except the basil.
3. Cover and bake for about 20 minutes until hot and bubbly. Sprinkle basil over casserole just before serving.

Total prep time: 20 minutes
Total time: 40 minutes

Friday, March 1, 2013

Strawberry Soup for Colds

Over the last month, I've had headache after headache. Last Thursday I suffered through a day long headache and woke up in the morning with a head cold that lasted through my birthday weekend, and hit its peak on my birthday. Reason #27 I don't celebrate my birthday: I'm usually sick on it. It normally takes a healthy person 5-7 days to get completely over a head cold, but since I'm pregnant, it'll take about 2 weeks. Who's excited about that? Not me...

I've been extra careful about not kissing my boys or sharing my glass or silverware with them but the inevitable happened. Hunter caught my cold. But worse. He seemed a little out of it on Wednesday but was nothing but snuggles yesterday. I don't think he even attempted to play with a single toy yesterday. He willingly took a nap too- very un-Hunter-like! 

When it comes to my kids being sick, Perry and I have been pretty fortunate. I think I remember one other time Hunter was sick, and maybe two times for JP, but this is the first time a fever has been involved so I feel a little inexperienced. For lunch yesterday we had chicken noodle soup, but Hunter didn't want to eat it because there was chicken in it...heaven forbid. I managed to get a bowl of soup into his tummy regardless and then he laid on the couch and snacked on crackers and water for the rest of the day. Although he didn't have a temperature until the evening, I had given him some ibuprofen throughout the day, as well as some drug-free cough suppressant for his horrible sounding cough.

Even with his 3 hour nap, he was still ready for bed at his normal time, which is a rarity. By the middle of the night, his daytime fever of 101 peaked to 103.2. Poor little guy was roasting and didn't wanted anything but mommy. I grabbed my pillow and traded my snoring husband for a stuffy-nose and hot little boy and we spent the rest of the night in the guest room. Needless to say, I hardly slept at all. By this morning, his fever dropped to 102.8. Not a lot, but better than nothing, so we went to work on getting it down....fast.

The one thing I knew Hunter would eat is strawberries. Bonus! They're good for you and are an awesome source of vitamin C, which helps boosts your immunity. So our game plan was Strawberry Soup for lunch. Here's what I used:
1 small tub of frozen strawberries
1 cup of water
1 1/2 tsp of Cinnamon
A little bit of Ginger

I used the stove to thaw the frozen strawberries. Once the water and strawberries were boiling, I turned the stove off and added the cinnamon and ginger. Cinnamon has a nice track record of relieving cold and flu symptoms, so I've heard, and my doctor has always suggested taking ginger to relieve morning sickness. (I also added 2 packets of sweetener for taste.) 
Right before I served it to Hunter, I grabbed the hand blender I received for Christmas (I LOVE it!) and gave the soup a few pulses. I left a few big chunks in there so that *someone* would believe me when I said there are strawberries in it.
 And what do you know? He gobbled it right up! 
And loved it! And JP was a little upset he had already picked out his lunch and had to forgo this option :) I, of course, ate the left overs. After all, I'm sick too! Was it the medicine I gave him or the soup that did the trick? I don't know, but I'm one happy momma because his temperature is down to 99.6. That I can handle!

Sunday, July 1, 2012

When You're Hungry...

One of my goals on my list of things to accomplish this year is to try 50, yes, 50 recipes. We're halfway through the year, and I'll admit that I'm not yet half way...nor am I a quarter of the way there....but hey, there's still half a year left! I say recipes because I'm allowing myself to be a little flexible....dinner here, dessert there...it'll all add up!

I am happy to report, however, that the new recipes I have tried have been a HUGE hit in my home. Most recently I made am Creamy Tomato Pasta, which can be found here.
Creamy Tomato Basil Pasta
Just look at all that yumminess.... That's not quite how mine turned out, but hey! It tasted amazing either way, and it was served with French Bread!

My sister Kim came over earlier this year and helped me to create Cheesecake Filled Strawberries....Delicious!
 And the boys helped out when making Apple Chips. I loved these! I should make them again...
A few months back, I stole the recipe for Three-Cheese Pasta Bake off my friend Kelsey's Pinterest board. (Thanks by the way for the great find!) and just recently repinned it to mine. Not sure why I didn't do it sooner! 
Three-Cheese Pasta Bake Recipe
Perry isn't a tomato lover like me, so I'm doing my best to make more dishes with Alfredo sauce instead of marinara. Its a rough change for me, but this dish was simply wonderful!

Try them out and let me know your thoughts on them!

Wednesday, May 30, 2012

My Favorite Drink

Hands down, my favorite drink is a Shirley Temple.
When my sisters and I were young, we would go out to the ranch with our dad to feed the cows (but mostly just to play on the hay bales!) Not every time, but often enough, before we headed home, we would drive to town to have a drink at the bar with all the other farmers. My dad would have a Roy Rogers and my sisters and I would get Shirley Temples. We were always excited when they'd give us extra cherries in our drinks!

There are a few variations to the drink but here's how I've enjoyed them!

Add a few ice cubes to your glass
Fill glass with Sprite or 7-Up
Top it off with a splash of Grenidine
Stir
Garnish with a couple cherries
ENJOY!

Other variations include adding lime juice and using Ginger Ale instead of Sprite. This is a great drink for kids! Or make it an adult beverage by adding 1 oz of vodka to make it a Dirty Shirley.

Wednesday, February 29, 2012

Cheesecake Filled Strawberries

As I was surfing the internet last night, looking for some meals for my weekly meal plan, I came across these strawberries. They looked delicious so I added them to the menu for dessert tonight. I can't wait! I was fortunate enough that my sister Kim showed up to help with these! Yay for sisterly moments! And yes mom, we used the infamous strawberry *claw*!

We prepared the strawberries by removing the stem and hollowing out the insides a little bit. This was mostly Kim's job : )


I used my mom's cheesecake recipe for the filling: 8 oz cream cheese blended until smooth, add 1/3 cup lemon juice, and 1 tsp of vanilla and beat together. I put it in a ziplock bag and cut the corner. This made filling each strawberry super easy. 


Initially we started out with 1 lb of strawberries, but quickly prepared the other container as we had a ton of extra filling. We also cut the bottoms of the strawberries off so they would stand on their own. VERY helpful!


And for the final touch, we sprinkled crushed graham crackers on the top. Yummy! I can't wait for dessert tonight!

Tuesday, February 28, 2012

Apple Chips

My boys love apples in just about any form, so today I figured we could give this a try. These apple chips are yummy!


They turned out to be super easy to make, especially with Hunter's help!

Hunter began by bringing me all the apples....he bit into a couple in the process!


I cut the apples in slices and Hunter helped to sprinkle the sugar-cinnamon mix. Some were a little more sugary than others!

We baked them at 200 for about 3 hours to dry them out. I think if I would have cut them a little thinner, it wouldn't have taken as long. 


These boys couldn't get enough!

Monday, February 20, 2012

Broccoli Salad

I'm not going to admit that I have picky eaters at home, but let's face it, who's kid isn't a picky eater from time to time? One day my boys LOVE Mac & Cheese the next time they won't even look at it. Despite their finicky behavior, I bought a cookbook for kids, full of food kids *supposedly*  like. I found one that not only the boys will eat, but dad will too!


Lucky for me, it was really simple! 
All you need is:
1 bag of Broccoli ( I used the Broccoli Steamers in the freezer isle)
1 container of Cherry Tomatoes
Italian Dressing (or of your choosing)

Depending on your mood, you can make it either hot or cold. Often times when I plan ahead, I'll thaw the broccoli in the fridge and then eat it cold. Other times I'll heat them up in the microwave.
I cut the cherry tomatoes in half, mostly to prevent the boys from choking. 
Mix together and add a little dressing, and Wah-La! Yummy salad in minutes!

I normally eat it just like this, but the other day I had salami left over in the fridge that we needed to use up. That was a great addition too!


I used to completely hate broccoli up until recently. I'm pretty sure it would made my top 15 Favorite Foods list if I had one. I'm also excited that little Hunter and JP often request "trees" for lunch/dinner. Speaking of which, this is my lunch today - Can't wait!